Create new rule
Create new rule
This functionality allows you to create a new rule. To create a new rule, you have to click on “Create” button on top right of the page, then fill in the mandatory fields of modal window (Name, Context) and then click on “Save” button.
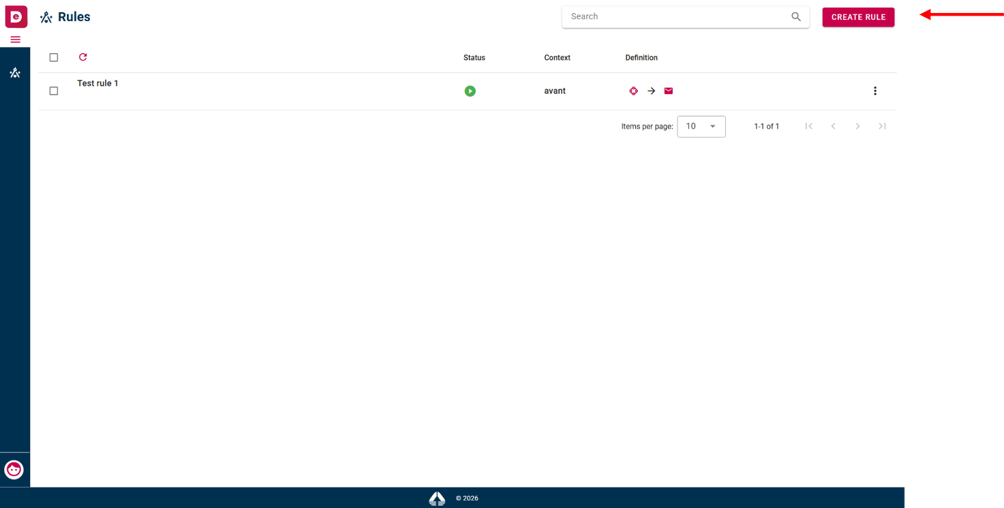 Create button
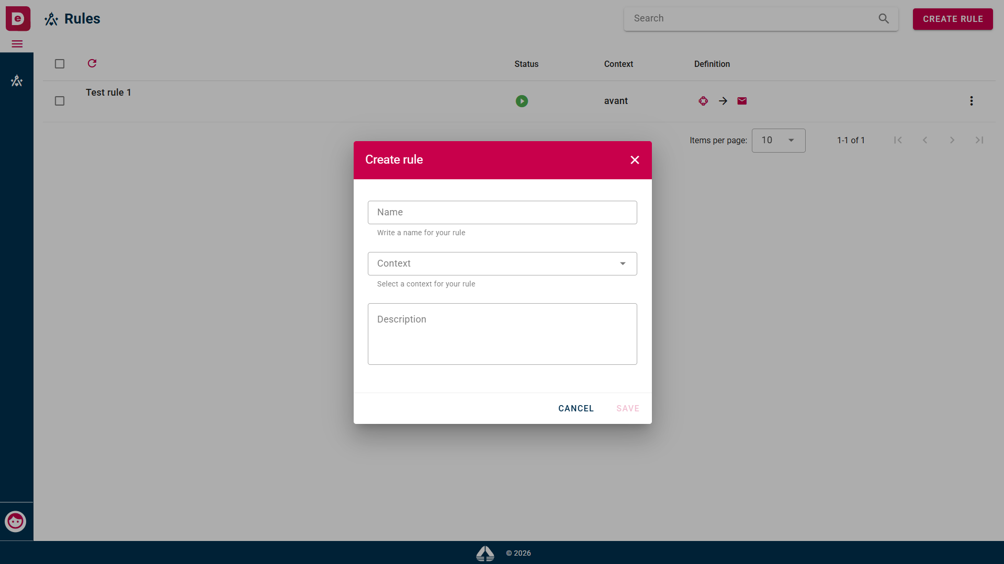 Rule creation modal window
Asset
Now you have to select an asset from available types (Mashup Flow, NGSI Entity, Google Calendar) and the system shows you the option in the corresponding list and then you have to click on right arrow to select it and visualize it on “Selected assets” list.
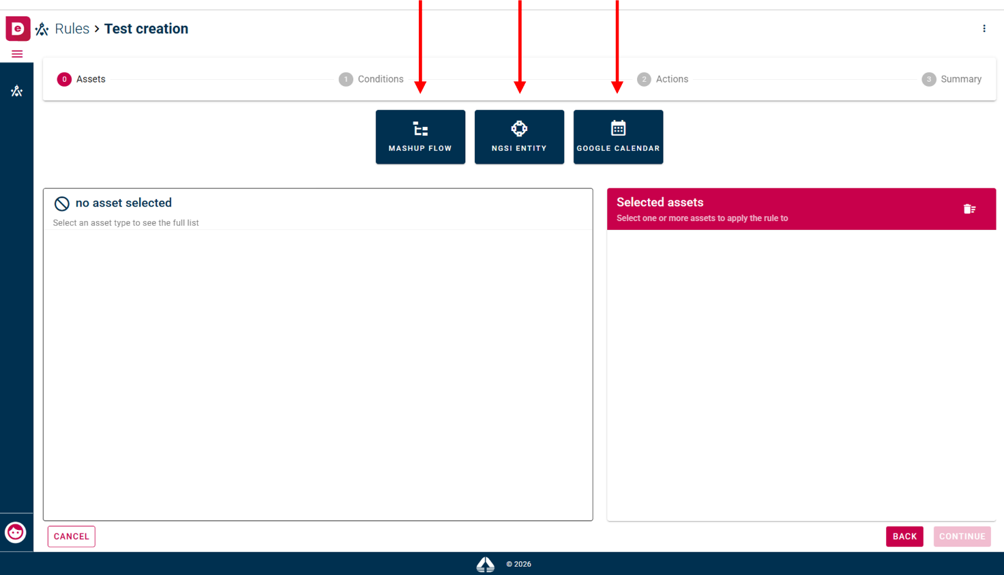 Assets available
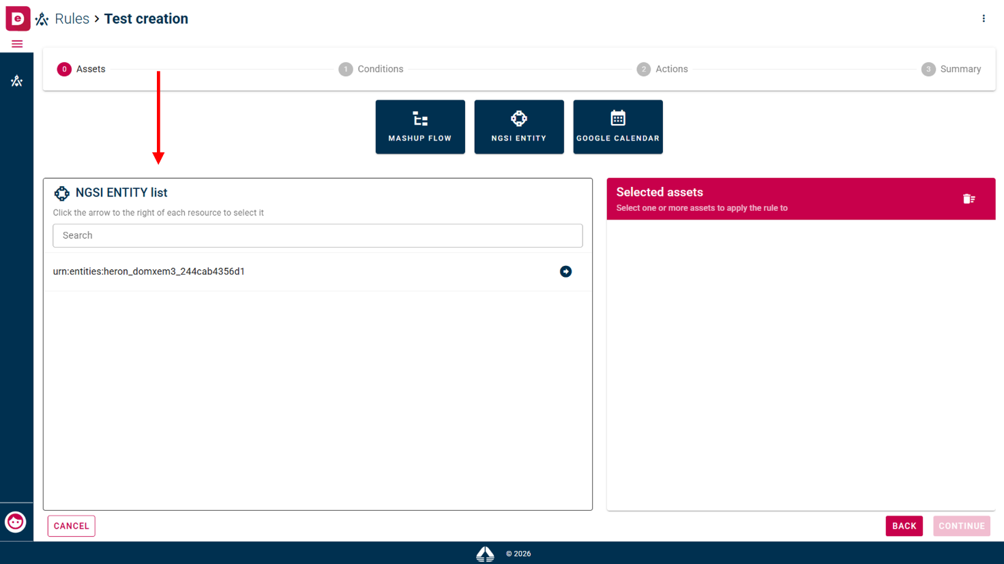 Asset list just selected
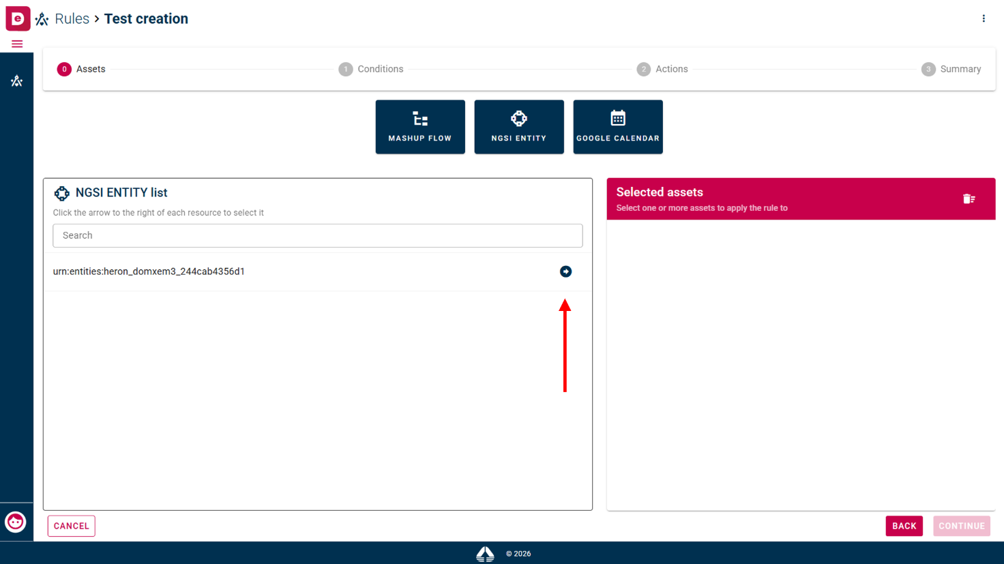 Right arrow to select specific asset
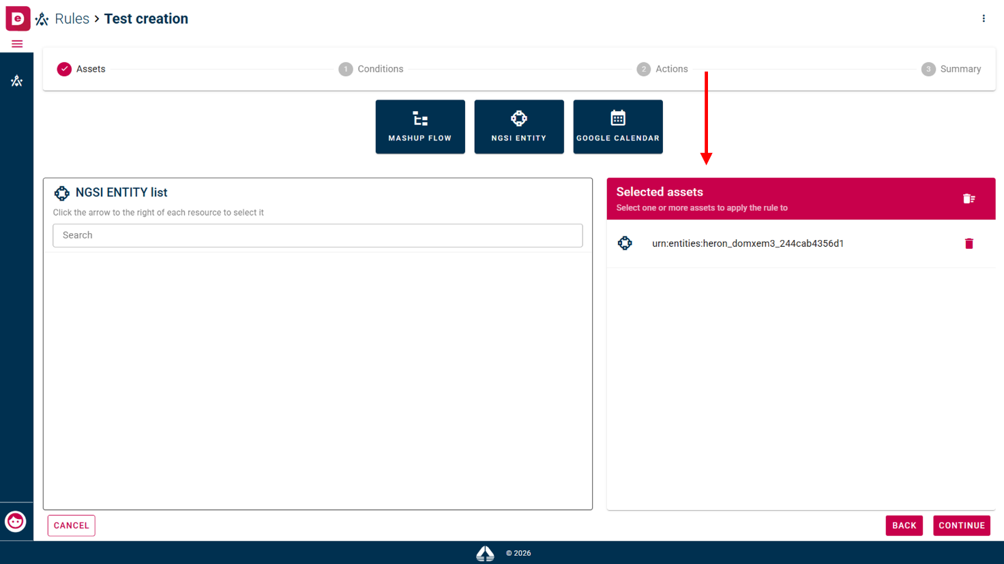 Selected assets list
Condition
Now you have to set conditions of assets selected before. You select the asset from select menu, then choose the property, the operator and insert value.
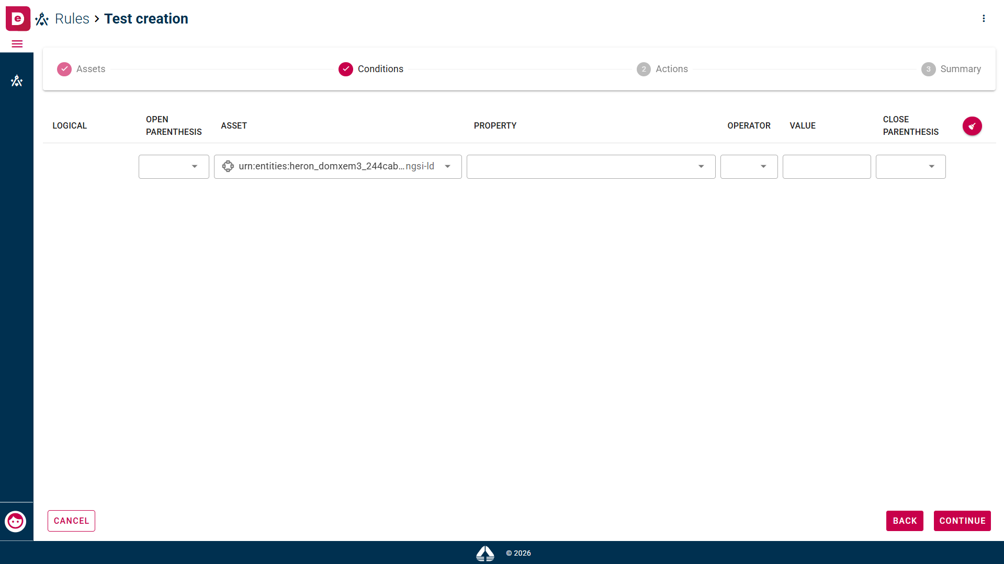 Conditions configuration fields
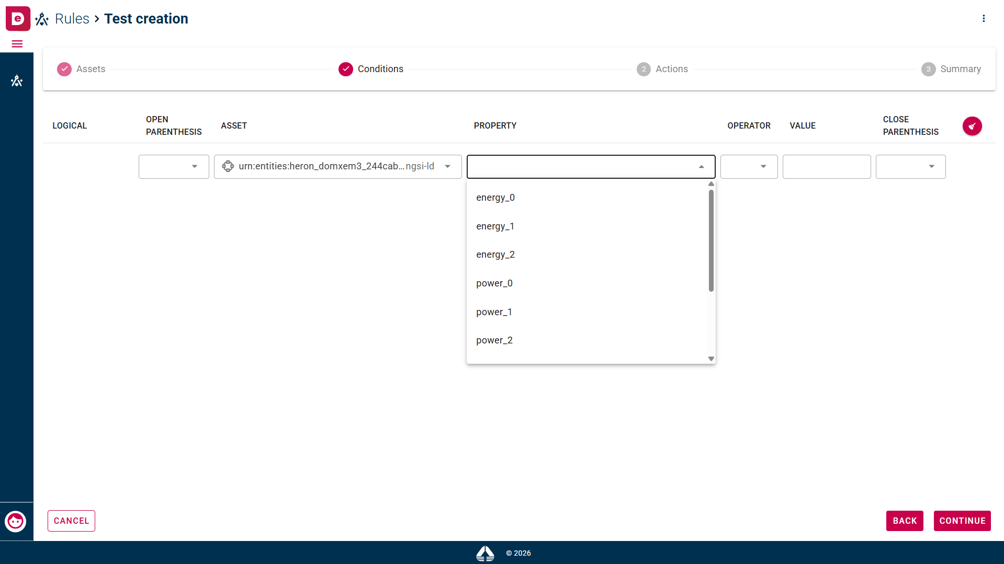 Properties Available
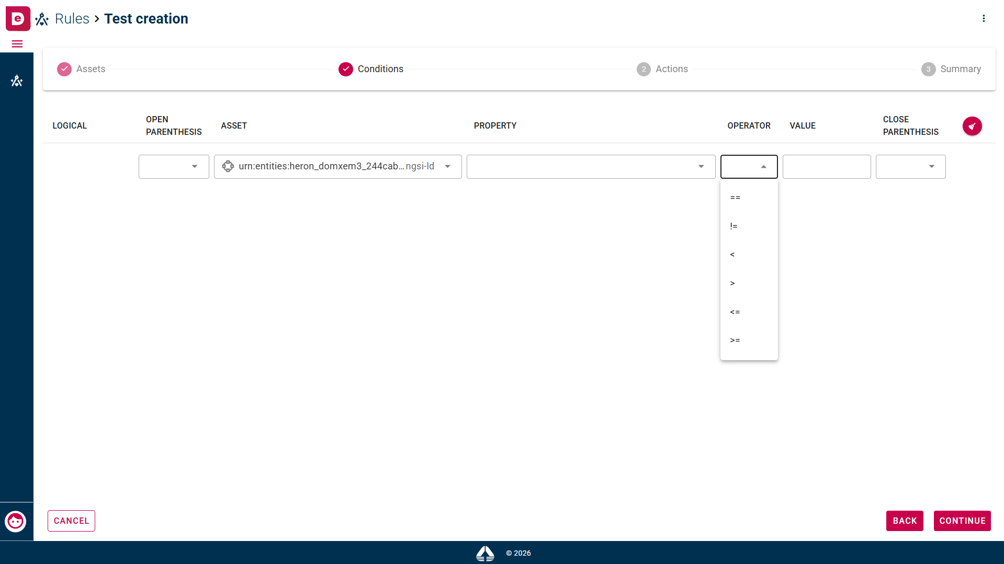 Operators Available
Action
Now you have to select an action from available list. When you select one of them, you can visualize corresponding settings on a dedicated form.
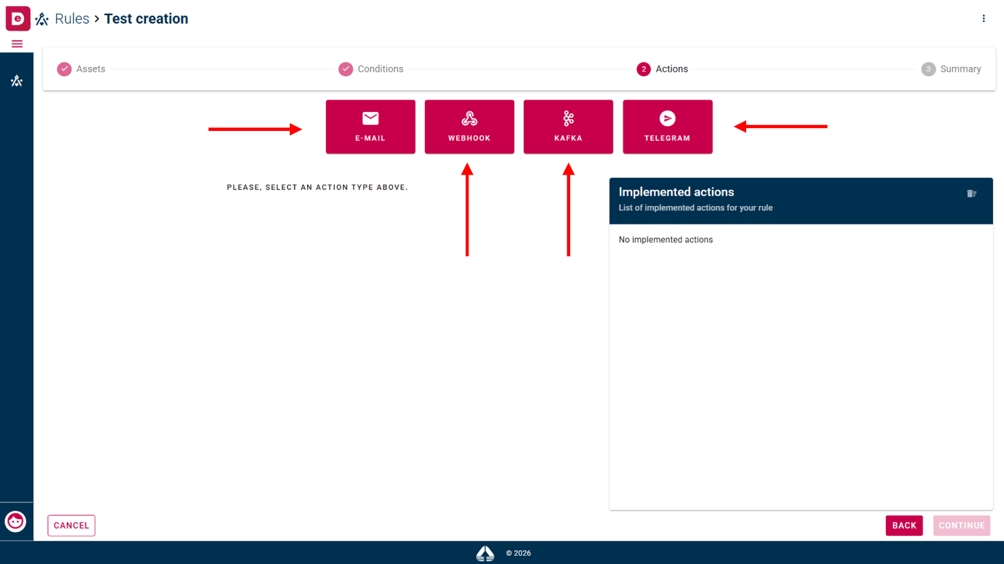 Actions Available
- To: The primary recipients of the e-mail.
- Cc: Additional recipients who should receive a copy of the e-mail.
- Subject: The title of the e-mail.
- Text: The main body of the e-mail.
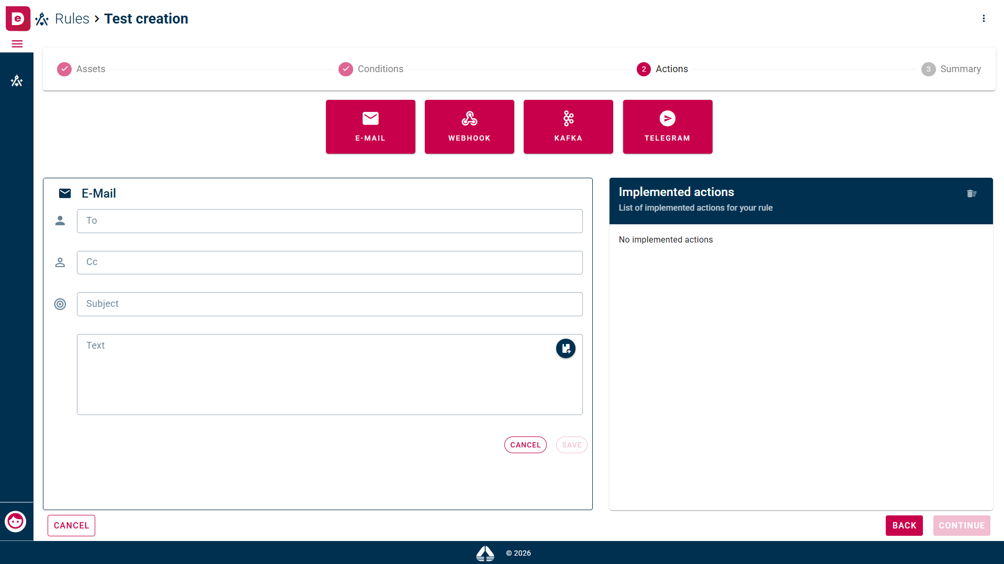 E-mail configuration fields
There is a button in text field. This button allows you to visualise the value of the asset that you selected earlier.
Button to add the reference to the value of one of the conditional properties
WEBHOOK
- Method: Select the HTTP method to be used for the webhook request (e.g. POST, GET, PUT, DELETE).
- URL: The endpoint to which the webhook request will be sent. Enter a valid and complete URL.
Headers (Key/Value): Additional HTTP headers to include in the request.
- Key: The name of the header parameter.
- Value: The value associated with the header key.
Headers are optional and can be added as needed for authentication, content type definition or other request metadata.
Queries (Key/Value): URL query parameters appendend to the webhook request.
- Key: The name of the query parameter.
- Value: The associated parameter value.
Query parameters are optional and allow you to pass additional information through the request URL.
Body: The content of the webhook request.
If a JSON object is provided, ensure it is valid. Invalid JSON will cause the webhook not to be processed. The body may contain static text or structured data. Users may also insert a reference to the value of a conditional property using the dedicated button. This allows dynamic values from the rule’s conditions to be included in the payload.
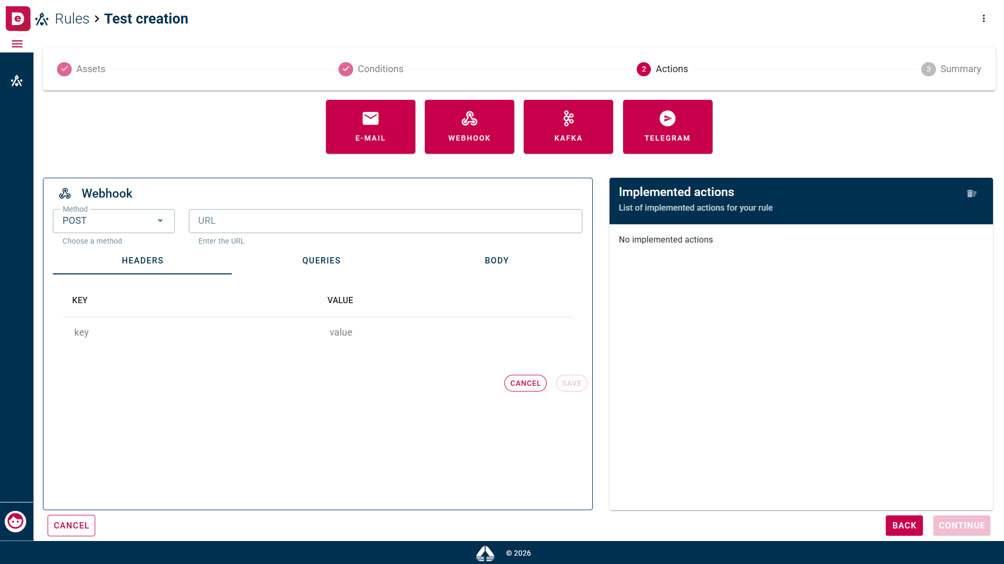 Webhook configuration fields
There is a button in body Json field. This button allows you to visualise the value of the asset that you selected earlier.
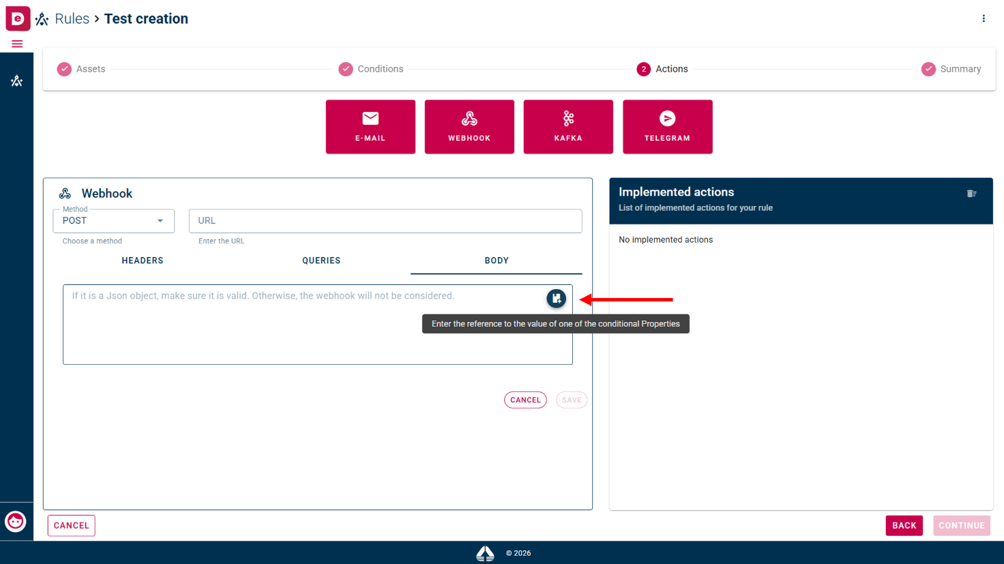 Button to add the reference to the value of one of the conditional properties
KAFKA
- Host: The address of the Kafka broker to which the message will be sent. Enter a valid hostname or IP address.
- Port: The port used by the Kafka broker to receive client connections.
- Topic name: The Kafka topic on which the message will be published. The topic must already exist on the target broker.
- Value serializer: The serialization class used to convert the message value into a format that can be transmitted to Kafka. Select an available serializer from the list.
- Key serializer: The serialization class used to convert the message key into a transmittable format. Select an appropriate serializer based on the expected data type.
- Value: The content of the Kafka message. Users may enter static text or structured content. A reference to the value of one of the conditional properties may be inserted using the dedicated button.
- Key: The key associated with the Kafka message. Keys are optional and may be used for message partitioning or consumer-side routing.
- Authorization type: The key associated with the Kafka message. Keys are optional and may be used for message partitioning or consumer-side routing.
Options include:
- PLAINTEXT: Transmits data in clear text without any encryption or authentication.
- SASL PLAINTEXT: Authenticates clients using SASL (e.g., PLAIN, SCRAM, Kerberos) while transmitting data in unencrypted clear text.
- SSL: uses Secure Socket Layer certificates configured on both client and broker.
- SASL SSL: Combines SASL authentication with SSL/TLS encryption for secure, authenticated data transfer.
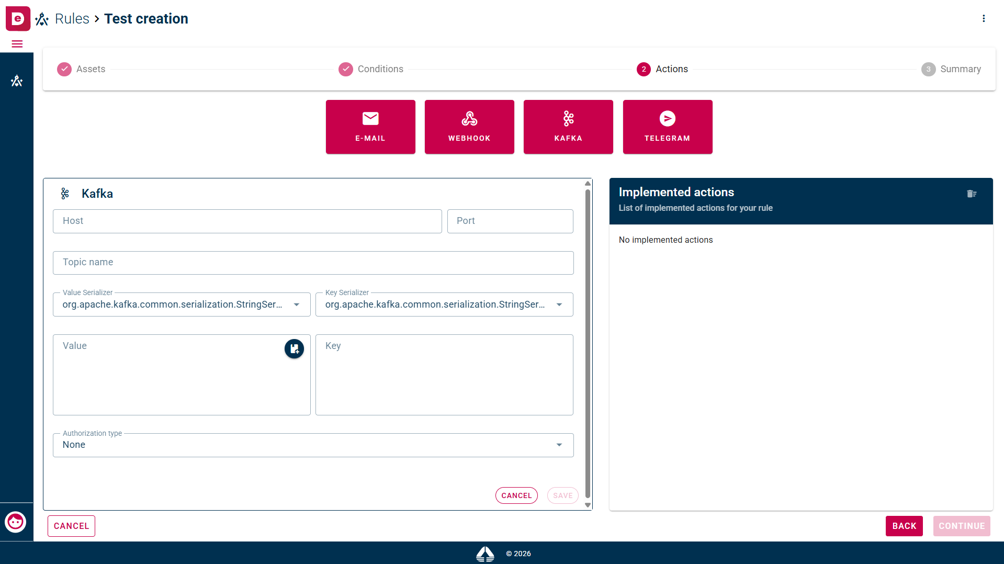 Kafka configuration fields
There is a button in value text field. This button allows you to visualise the value of the asset that you selected earlier.
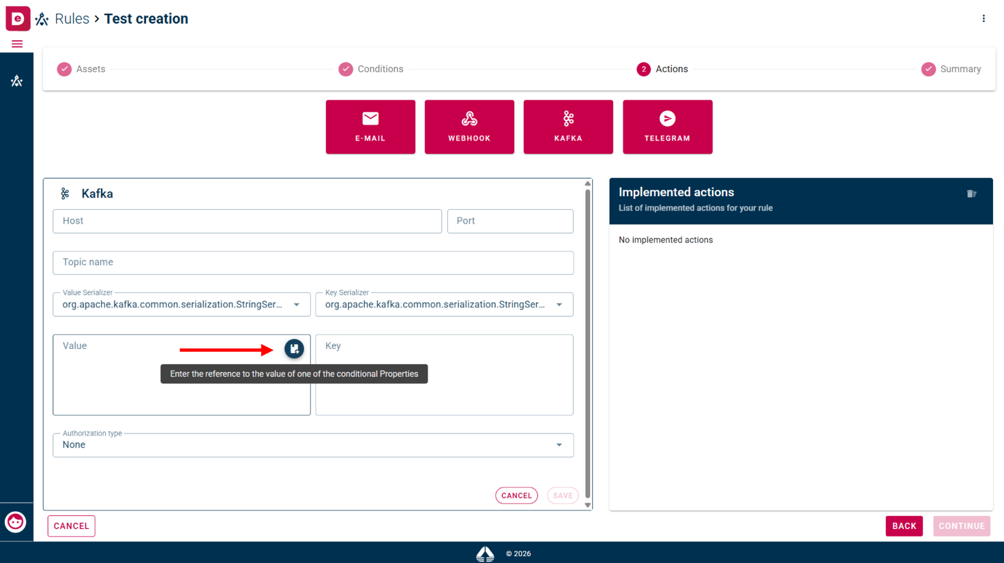 Button to add the reference to the value of one of the conditional properties
TELEGRAM
- Chat ID: The unique numerical identifier associated with a telegram user. This ID allows the system to determine the exact destination of the message. Users can obtain their Chat ID by sending the /start command to a telegram bot, which returns the name, username, chat id and language of user.
- Message: The text that will be sent to the specified telegram chat ID. You may enter fixed text or insert a reference to the value of one of the conditional properties using the dedicated button. The final message will include any dynamic values added through these references.
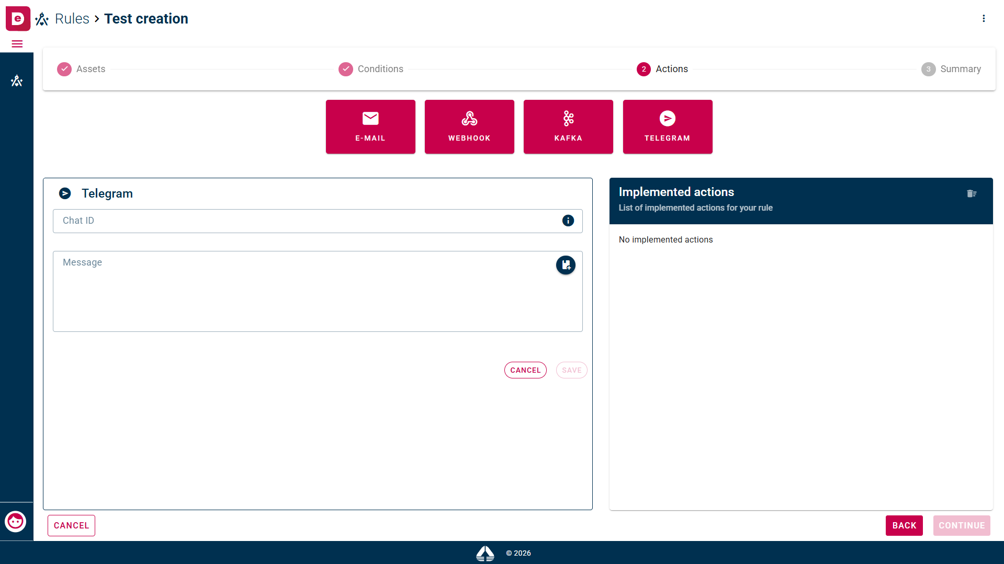 Telegram configuration fields
There is a button in message text field. This button allows you to visualise the value of the asset that you selected earlier.
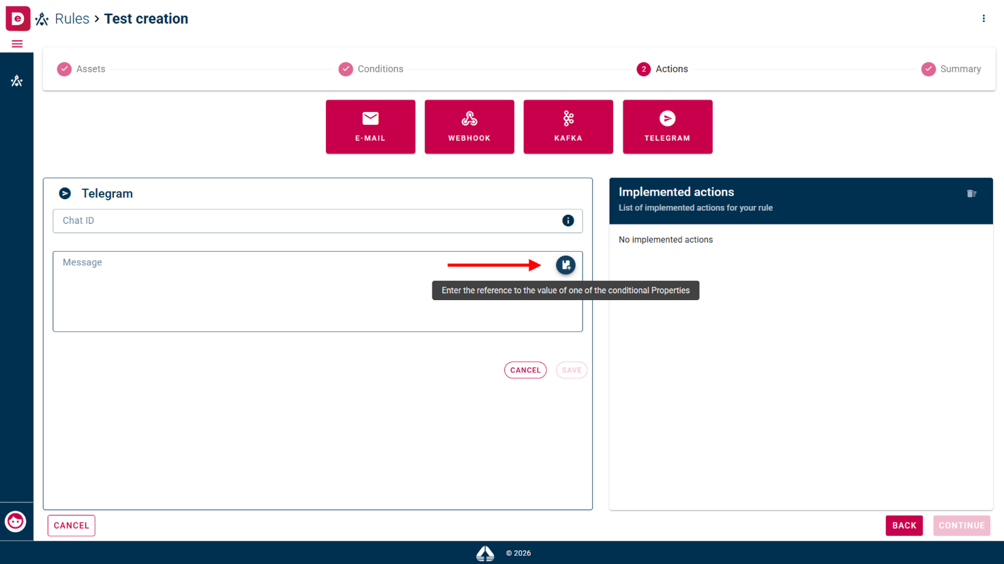 Button to add the reference to the value of one of the conditional properties
SSE
This action sends a Server-Sent Event notification when the rule conditions are met. No additional settings are required besides the frequency.
At the end of each one, you have to click on “Save” button to save actions and see it on “Implemented actions” card. The system asks you the maximum action frequency and you can select “Everytime” if you want that the action will be sent every time the rule conditions are met or select “Custom” and you can choose times, amount and units. Now, in the final step you can review the summary of all previous steps, which includes your rule configuration. To save rule and see it on rules list you have to click on “Save” button.
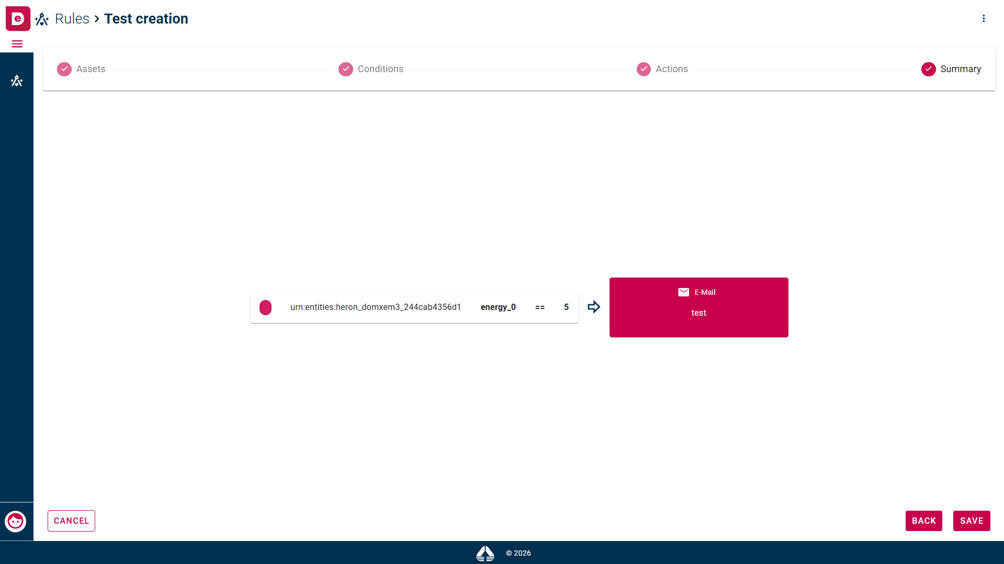 Summary of creation steps
If the rule is created successfully, you can see it in rules list.
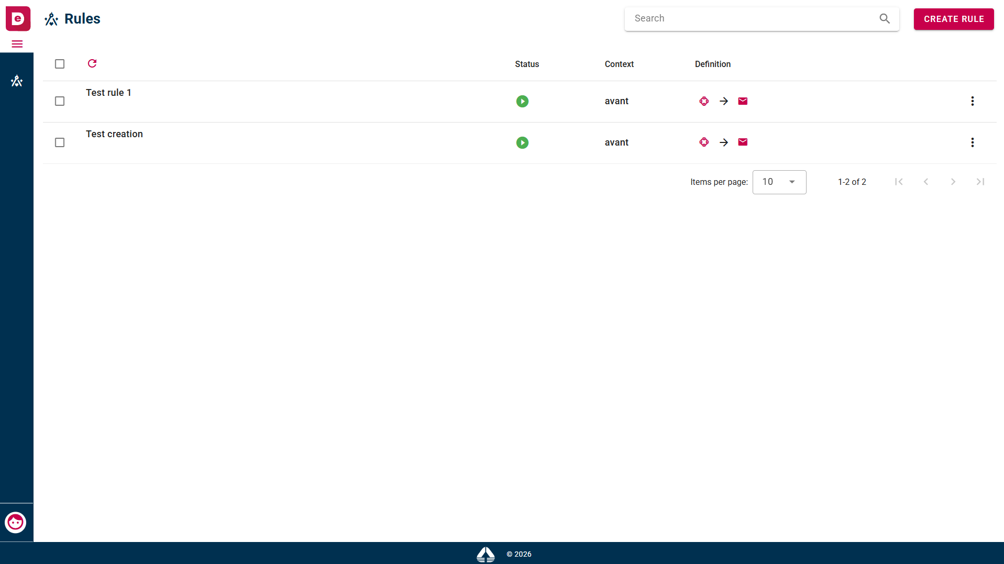 Rules list after successfully rule creation